As mentioned in the previous post, the original Unreal Tournament holds a special place in my memories when it comes to gaming experiences. And not necessarily because of the competitive elements, but more so because it took me to an assortment of diverse & beautiful fictional settings, inspired not just by science fiction, but also fantasy and medieval history as well. It also had a kick ass soundtrack to boot. So after playing the game again recently, I wanted to try and recreate some of its gameplay mechanics in Unreal Engine. While my first project was focused on Creating a Jump Pad (inspired by the UT99 Jump Boots), this time, I figured why not go for something more iconic and decided to recreate the Translocator.

At first glance, it would seem like all you'd have to do would be to just launch a projectile and then alt fire to teleport to its location. But upon closer inspection, you can find that there is a bit more to this device. For example, whenever the Translocator's Destination Module lands on the ground, it always ends up facing upwards by the time it comes to rest.
In terms of actual gameplay features, there is also the option to Telefrag (which I won't be covering in this tutorial) your opponents by throwing the Destination Module to their location before teleporting to it. So while the teleportation aspect is what comes to mind first when you think of it, the presence of the more obscured features makes the Translocator somewhat unique as a weapon/gadget when compared to a generic teleporter. So anyways, without wasting any more time on the specifications of the device, let's get right down to the design process.
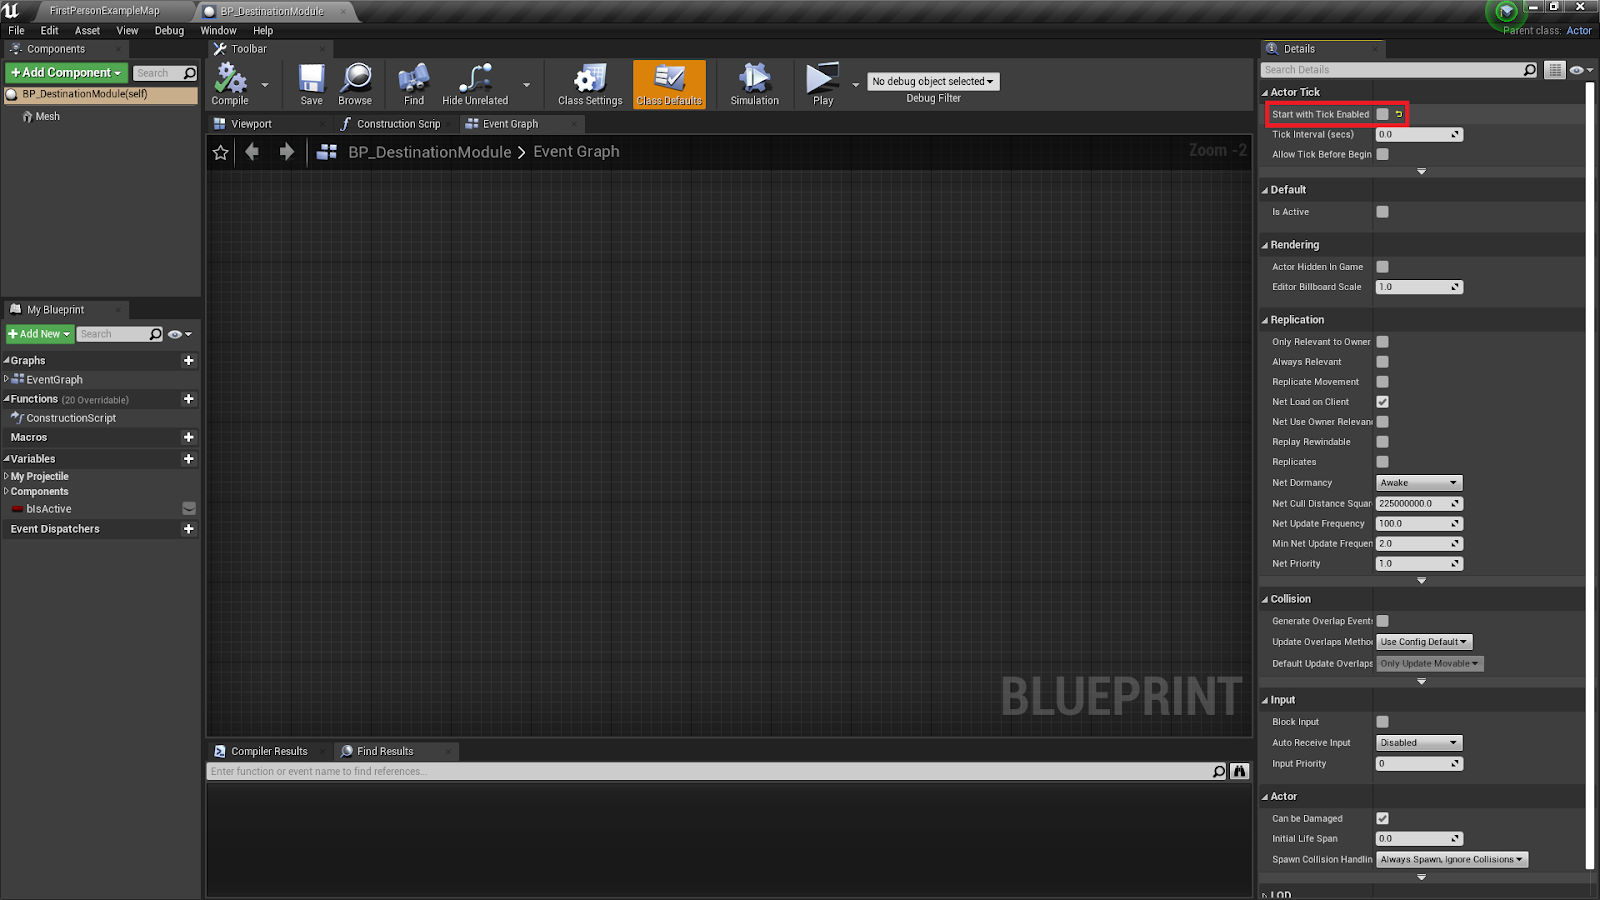
Alright, so the first order of the business is to create an Actor blueprint for our projectile. I'm going to name it BP_DestinationModule. Now we're going to open the new blueprint and untick its Start with Tick Enabled parameter. We'll be turning it on and off manually at runtime, but more on that later.

Now let's open up the new blueprint and add a Static Mesh Component to act as our projectile mesh. Since we don't want this mesh to collide with anything before we fire the Translocator, let's set its Collision Enabled parameter to No Collision by default.

Normally you would add a Projectile Movement Component as the next step. However, unlike your typical bullet projectiles, the Translocator fires a pod that can be retrieved and fired again. And that brings us to a complication since the Projectile Movement Component cannot be restarted once the actor has totally come to a halt. You can try reactivating it or resetting the initial velocity, but that's not going to be of any help. Hence we're going for an alternative approach: adding/removing projectile movement components at runtime. Every time we launch the module, we'll add a component and once it comes to a stop or if it is retrieved back by the player, we'll destroy it.
With that said, we'll start out by adding a new boolean variable bIsActive to our Destination Module blueprint. This variable will be used to update and keep track of the module's state.
Next we're going to create a custom event for launching the Destination Module. As shown in the screenshot below, we first check if bIsActive is True. If the module is already active, we do not want to do anything. But if it isn't, we'll add a Projectile Movement Component (you can find its default settings in the screenshot) and bind a new event to the its On Projectile Stop event. Let's call this new event OnProjectileStopped. We'll get back to its implementation in the next step, but basically what's happening here is that this new event will be called as soon as the projectile motion is completed. Finally we're also going to turn on the collision and set the actor to tick.

Alright, let's move on to the implementation for OnProjectileStopped event that we added in the previous step. First, we're going to destroy the Projectile Movement Component because we'll be spawning in a new one next time. The actor tick can also be disabled since it is no longer required during this phase. Since these two steps are going to be called again elsewhere we'll group them under a new event DisableMovement.

With the launch system taken care of, we now move on to the process of resetting the Destination Module when the player retrieves it back. For this purpose, we add a new event Reset and it's also going to call the OnProjectileStopped event, followed by two additional nodes to disable the collision and reset the value of bIsActive variable.

So at this point, we have essentially finished what I'd call the core logic of the Destination Module. But in the spirit of keeping it true to the inspiration, I'll also show you how to make sure that it always lands facing upwards. And this is where the Event Tick comes in to play.

As shown above, we're using FInterp To nodes to interpolate the Roll & Pitch values of the Mesh rotation to 0.0 while keeping the Yaw as it is. This will ensure that the mesh always faces upwards. However, you might have noticed that there is a branch node placed at the start of the tick event. It's basically checking if the velocity (vector length squared) is below a certain threshold (which I've set to 625), thus causing the rotation updates to kick in only moments before the projectile comes to a rest.
And with that, the Destination Module of our Translocator is ready for use. I had initially assumed that the entire tutorial would be shorter than this. But since this post has already gotten a bit too long, I will be sharing the remainder of the tutorial in a second part, which will cover the projectile firing and retrieval mechanisms for the Translocator. But if anyone's interested in what the final result looks like, you can find the video in my YouTube channel. So see you in the next part of the tutorial.
At first glance, it would seem like all you'd have to do would be to just launch a projectile and then alt fire to teleport to its location. But upon closer inspection, you can find that there is a bit more to this device. For example, whenever the Translocator's Destination Module lands on the ground, it always ends up facing upwards by the time it comes to rest.
In terms of actual gameplay features, there is also the option to Telefrag (which I won't be covering in this tutorial) your opponents by throwing the Destination Module to their location before teleporting to it. So while the teleportation aspect is what comes to mind first when you think of it, the presence of the more obscured features makes the Translocator somewhat unique as a weapon/gadget when compared to a generic teleporter. So anyways, without wasting any more time on the specifications of the device, let's get right down to the design process.
Alright, so the first order of the business is to create an Actor blueprint for our projectile. I'm going to name it BP_DestinationModule. Now we're going to open the new blueprint and untick its Start with Tick Enabled parameter. We'll be turning it on and off manually at runtime, but more on that later.
Now let's open up the new blueprint and add a Static Mesh Component to act as our projectile mesh. Since we don't want this mesh to collide with anything before we fire the Translocator, let's set its Collision Enabled parameter to No Collision by default.

Normally you would add a Projectile Movement Component as the next step. However, unlike your typical bullet projectiles, the Translocator fires a pod that can be retrieved and fired again. And that brings us to a complication since the Projectile Movement Component cannot be restarted once the actor has totally come to a halt. You can try reactivating it or resetting the initial velocity, but that's not going to be of any help. Hence we're going for an alternative approach: adding/removing projectile movement components at runtime. Every time we launch the module, we'll add a component and once it comes to a stop or if it is retrieved back by the player, we'll destroy it.
With that said, we'll start out by adding a new boolean variable bIsActive to our Destination Module blueprint. This variable will be used to update and keep track of the module's state.
Next we're going to create a custom event for launching the Destination Module. As shown in the screenshot below, we first check if bIsActive is True. If the module is already active, we do not want to do anything. But if it isn't, we'll add a Projectile Movement Component (you can find its default settings in the screenshot) and bind a new event to the its On Projectile Stop event. Let's call this new event OnProjectileStopped. We'll get back to its implementation in the next step, but basically what's happening here is that this new event will be called as soon as the projectile motion is completed. Finally we're also going to turn on the collision and set the actor to tick.

Alright, let's move on to the implementation for OnProjectileStopped event that we added in the previous step. First, we're going to destroy the Projectile Movement Component because we'll be spawning in a new one next time. The actor tick can also be disabled since it is no longer required during this phase. Since these two steps are going to be called again elsewhere we'll group them under a new event DisableMovement.

With the launch system taken care of, we now move on to the process of resetting the Destination Module when the player retrieves it back. For this purpose, we add a new event Reset and it's also going to call the OnProjectileStopped event, followed by two additional nodes to disable the collision and reset the value of bIsActive variable.

So at this point, we have essentially finished what I'd call the core logic of the Destination Module. But in the spirit of keeping it true to the inspiration, I'll also show you how to make sure that it always lands facing upwards. And this is where the Event Tick comes in to play.

As shown above, we're using FInterp To nodes to interpolate the Roll & Pitch values of the Mesh rotation to 0.0 while keeping the Yaw as it is. This will ensure that the mesh always faces upwards. However, you might have noticed that there is a branch node placed at the start of the tick event. It's basically checking if the velocity (vector length squared) is below a certain threshold (which I've set to 625), thus causing the rotation updates to kick in only moments before the projectile comes to a rest.
And with that, the Destination Module of our Translocator is ready for use. I had initially assumed that the entire tutorial would be shorter than this. But since this post has already gotten a bit too long, I will be sharing the remainder of the tutorial in a second part, which will cover the projectile firing and retrieval mechanisms for the Translocator. But if anyone's interested in what the final result looks like, you can find the video in my YouTube channel. So see you in the next part of the tutorial.
Comments
Post a Comment